|
Let's get started and remember to save often.
Step 1. Open a new Image 600 X 550 with a white background.
Step 2. Get your tube tool and choose Modern circles. It came with psp version 9.
Step 3. keep your mouse clicked as you move around your canvas, to add different sized circles.
See below.

Step 4. Get your preset shapes tool and choose two colors from any circle. I choose teal and pink and
then choose Elipse with the settings below and then draw out a circle holding down your shift key to make it perfect.
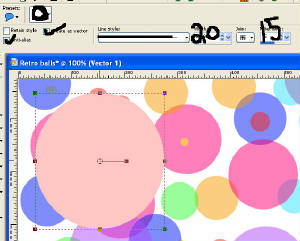
Step 5. Now over in your layer pallete change the opacity to 77. Next draw out another elipse with a different
choice of color, using the same settings as before. It will draw it out on the same vector layer as before. That is okay.
Step 6. Get your magic wand with the settings below and click inside one of your circles

Step 7. now go to selections/ modify/ contract by 10 pixels.
Step 8. Now get your picture of choice, Paste as a new layer and place inside your circle selection. Now
invert and hit the delete key on your keyboard.
Step 9. Repeat steps 6 - 8 to your second circle.
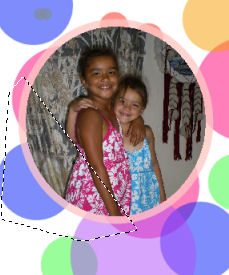
Step 10. Now for the harder part, but don't let me scare you, it's pretty easy. Get your Lasso tool and
use the settings below.

Step 11. Make a selection like the one shown below
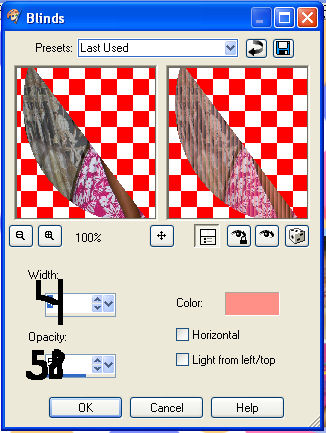
Step 12. Okay now right click the picture layer(Raster 1) over in your layer pallete and promote selection
to layer. Now click your picture layer again, (Raster 1) and hit the delete key on your keyboard, now go to your promoted
selection layer and change the opacity to 54, now add a blind effect using the settings below
Step 13. Repeat steps 11 and 12 to get the same effect on both sides of both of your circles. Hide
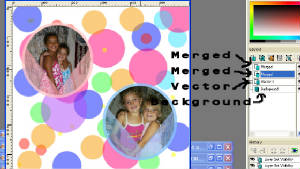
Raster 2 and your promoted selection layer for Raster 2, your Vector layer, and your background layer, Merge visable your
Raster 1 layer and raster 1 promoted selection layer. Now Hide Merged layer and unhide Raster 2 and your promoted selection
for Raster 2 and merge visable. Your layer pallete and photo should now look like the one shown below.
Step 14. Now for the text. Get your text tool, with create as vector checked, and use the Font and
size of choice and the same colors as before. But after you type your first text with using both colors invert your colors
for your second text.
Step 15. Move your cursor over your first circle until you get the half circle under your A symbol.
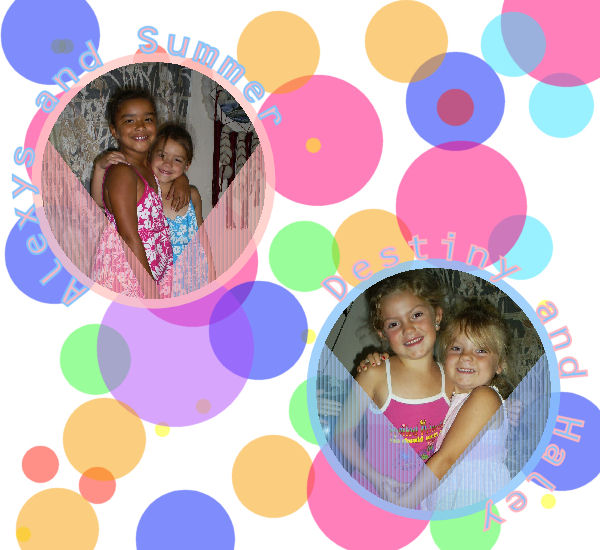
Click to type your first text. I typed out the names of my nieces. Now you may not like how your letters appear around your
circle but don't worry you can fix that. When you move your text you'll notice a small node that stays tight against your
circle and moves along with teh circle. Play with that node till you are satisfied, do the same to your other circle remembering
to invert your background and foreground colors and vwa-lah you are now done.
|
