Lets get started and remember to save often
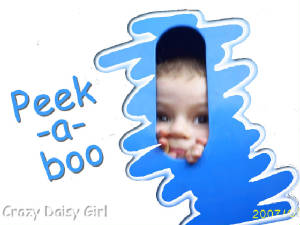
Peek-a-boo
First opened an image of chose. Resize if need be. I choosed
an image that my son was hiding in.
Next duplicate your layer. Rename this layer zig zag. Promote background
layer to make it a raster layer and rename it white layer. Make your zig zag layer active. Grab your brush tool and use these
settings
preset - defult | shape - circle | size
- 83 | Hardness - 100 | step - 25 | Density, thickness and opacity -
100 | foreground and background white |
Okay make a quick zig zag motion on your active layer leaving a white area
on your layer. Check my picture for an example. Now get your magic wand use these settings add, rgb value, contiguous
and anti alias check, tolerence and feather 0 inside.
and now select inside your new white area. Mask sure your on
your siz zag layer hit delete. Now make your white layer active, now go to selections invert. Now hit delete again. Now
get your flood fill tool and while still on your white layer flood fill your inverted selection. You won't be able to see
anything yet but you will. Okay now right click your zig zag layer and delete it. Now you should be able to see your white
background with your zig zagged picture. Next add a new raster layer and name it text. Make sure you have a two colors selected
from your picture and write out your text using any settings and font that you like. I used the two blue colors and
the font comic sans. Add your watermark to a new raster layer and vwa-lah. Your done. I'm sorry I don't remeber how
I got the blue outline around my zig zag but I'm sure you'll figure it out