Dream Catcher Art
In this tut I will show you how I turned a dream catcher into a work of art.
Lets get started and remember to save often
Step 1: Copy and paste this picture as a new image in your psp program. Now choose File/export/picture tube. Use these
settings.
cells across - 1 cells down - 1 total cells - 1. Over on the right of the box it will say tube name. Name it
dream
catcher and then click okay. You now have a new picture tube.
Open a new image with the size 400 x 400, raster background and with a white background. Click okay.
Step 2: Go to layers and new raster layer. Now you should have two layers in your layer palette.
Step 3: Get your new tube from you tube tool. Paste it right about the middle. Now if you want it tall, keep it the same
if
not get your raster deform tool and flip it around until it's sideways.
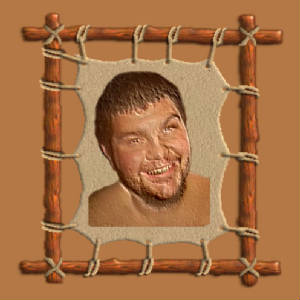
Step 4: Choose an image that you want on your dreamcatcher. Open it up.
Step 5: grab your eraser tool and erase the background of your image. As you seen in my sample on my creations page,
I
cut out everything but a head and a little bit of the body, You can do just the head or the whole body depending on
the
picture you chose.
Step 6: Get your magic wand tool and select anywhere in the transparent background (That is the grey and white squares).
now
click selections and invert. Now a frame of marching ants will be around your face or your selection. Copy this and
now
go to your dream catcher image. Paste it as a new layer. Now if it's too big or not big enough, get your raster
deform
tool and make it perfect, place it in the center and make it the right size. Your halfway there.
Step 7: Click on Effects/textured effects/sandstone. Use these settings.
Blur: 3
Detail: 11
Luminance: 14
Angle: 42
click okay. If you don't like these settings play around a bit with the detail and luminance settings to make it lighter
or
darker. Now your gonna wanna round off your edges of the newly pasted layer. So grab your eraser tool and round off
the
edges, if they are already then don't worry about it. Next grab your selections tool and make a rectangle selection
around
all of your dream catcher and then click image/crop to selection and wah-lah, Your master piece is finished. I
hope you
had fun and I'd love to see your results, email them to me at
phillip102604@yahoo.com
